 Ask A Bot
Source Maps
This guide assumes you are using a Sentry React Native SDK on version 5.11.0 or higher.
If you are on an older version and you want to upload source maps we recommend upgrading your SDK to the newest version.
To get unminified stack traces for JavaScript code, source maps must be generated and uploaded. The React Native SDK handles source maps automatically for iOS with Xcode and Android with Gradle, if you do not use custom values.
Set Up Automatic Upload
The easiest way to configure automatic source maps upload is to use the Sentry Wizard:
npx @sentry/wizard@latest -i reactNativeThe wizard will guide you through the following steps:
- Logging into Sentry and selecting a projectRepresents your service in Sentry and allows you to scope events to a distinct application.
- Installing the necessary Sentry packages
- Configuring RN build tools to generate and upload source maps
It supports JavaScript Core (including RAM Bundle) and Hermes. If you want to configure automatic source maps upload manually, follow the steps on the Manual Configuration page.
Disable Automatic Upload
If you want to disable the automatic upload of source maps, you can set the SENTRY_DISABLE_AUTO_UPLOAD environment variable:
export SENTRY_DISABLE_AUTO_UPLOAD=trueAdd the shouldSentryAutoUpload function in android/app/build.gradle:
apply from: "../../../sentry.gradle"

sentry {
    autoUploadProguardMapping = shouldSentryAutoUpload()
    uploadNativeSymbols = shouldSentryAutoUpload()
}
Manual Upload With Hermes
To manually upload source maps, first, you need to generate the source maps and bundle. Then compile the Hermes bytecode bundle, and finally upload the source map to Sentry.
Start with adding Sentry React Native Metro Plugin to your metro.config.js:
const { getDefaultConfig, mergeConfig } = require("@react-native/metro-config");
const {
  createSentryMetroSerializer,
} = require("@sentry/react-native/dist/js/tools/sentryMetroSerializer");

const config = {
  serializer: {
    customSerializer: createSentryMetroSerializer(),
  },
};

const m = mergeConfig(getDefaultConfig(__dirname), config);
module.exports = m;
Generate the React Native Packager (Metro) bundle and source maps:
npx react-native bundle \
  --dev false \
  --minify false \
  --platform android \
  --entry-file index.js \
  --reset-cache \
  --bundle-output index.android.bundle \
  --sourcemap-output index.android.bundle.map
Compile Hermes bytecode bundle and source map:
node_modules/react-native/sdks/hermesc/osx-bin/hermesc \
  -O -emit-binary \
  -output-source-map \
  -out=index.android.bundle.hbc \
  index.android.bundle
rm -f index.android.bundle
mv index.android.bundle.hbc index.android.bundle
Compose Hermes bytecode and (React Native Packager) Metro source maps:
mv index.android.bundle.map index.android.bundle.packager.map
node \
  node_modules/react-native/scripts/compose-source-maps.js \
  index.android.bundle.packager.map \
  index.android.bundle.hbc.map \
  -o index.android.bundle.map
node \
  node_modules/@sentry/react-native/scripts/copy-debugid.js \
  index.android.bundle.packager.map index.android.bundle.map
Make sure sentry-cli is configured for your
.envSENTRY_ORG=example-org
SENTRY_PROJECT=example-project
SENTRY_AUTH_TOKEN=sntrys_YOUR_TOKEN_HEREUpload the bundle and source map to Sentry:
node_modules/@sentry/cli/bin/sentry-cli sourcemaps upload \
  --strip-prefix /path/to/project/root \
  index.android.bundle index.android.bundle.map
When uploaded, the bundle file will have a size of 0 bytes. This is expected with Hermes bytecode and won't affect the source maps resolution.
For more Hermes guides, see the Hermes Throubleshooting docs section.
Manual Upload With JavaScript Core
To manually upload source maps, first, you need to generate the source maps and bundle. Then compile the Hermes bytecode bundle, and finally upload the source map to Sentry.
Start by adding Sentry React Native Metro Plugin to your metro.config.js:
const { getDefaultConfig, mergeConfig } = require("@react-native/metro-config");
const {
  createSentryMetroSerializer,
} = require("@sentry/react-native/dist/js/tools/sentryMetroSerializer");

const config = {
  serializer: {
    customSerializer: createSentryMetroSerializer(),
  },
};

const m = mergeConfig(getDefaultConfig(__dirname), config);
module.exports = m;
Generate the React Native Packager (Metro) bundle and source maps:
npx react-native bundle \
  --dev false \
  --minify true \
  --platform android \
  --entry-file index.js \
  --reset-cache \
  --bundle-output index.android.bundle \
  --sourcemap-output index.android.bundle.map
Make sure sentry-cli is configured for your
.envSENTRY_ORG=example-org
SENTRY_PROJECT=example-project
SENTRY_AUTH_TOKEN=sntrys_YOUR_TOKEN_HEREUpload the bundle and source map to Sentry:
node_modules/@sentry/cli/bin/sentry-cli sourcemaps upload \
  --strip-prefix /path/to/project/root \
  index.android.bundle index.android.bundle.map
Optional Release and Distribution
To correctly attribute events sent to Sentry to a release, both the release and dist values will need to be set. You can set these values in the call to init, as discussed in our Releases & Health documentation.
Sentry.init({
dsn: "https://examplePublicKey@o0.ingest.sentry.io/0",
release: "my-project-name@2.3.12",
dist: "52",
});The automatic source maps upload script doesn't detect custom values for releases. This means that if you use a custom value for your release, other than the version included with the built-in Xcode or Android Studio, the automatic source maps upload script won't work. Instead, you can set the SENTRY_RELEASE and SENTRY_DIST environment variables, which the automatic source maps upload script will use. This will ensure that the given custom release and dist values are used.
export SENTRY_RELEASE="my-project-name@2.3.12"
export SENTRY_DIST="52"
Legacy Instructions for Preparing Source Maps for a Release
You need to generate and upload the source maps at build time for every release of your app for the events sent to be correctly unminified. To do so, follow these steps:
1. Configure CLI
Configure the CLI by reviewing the configuration guide for CLI commands.
2. Generate the bundle and source maps
Hermes
If you use the Hermes engine, you will need to follow this guide to compile source maps for Hermes.
You can use the React Native CLI to generate the JavaScript bundle and source maps for your app:
react-native bundle \
  --dev false \
  --platform android \
  --entry-file index.android.js \
  --reset-cache \
  --bundle-output index.android.bundle \
  --sourcemap-output index.android.bundle.map
Learn more about the React Native CLI bundle command.
2.1 Pass your entry file
Pass your entry file to --entry-file for Android or iOS, respectively. By default, this file is usually named index.js. It is often named index.android.js for Android or index.ios.js for iOS.
2.2 Output your bundle files and source maps
These files will output your bundle and source maps. By default, these files are named index.android.bundle and index.android.bundle.map for Android and main.jsbundle and main.jsbundle.map for iOS.
The source map's name must be the bundle's name appended with .map for source maps to correctly be detected.
3. Upload the bundle and source maps
node_modules/@sentry/cli/bin/sentry-cli releases \
    files <release> \
    upload-sourcemaps \
    --dist <dist> \
    --strip-prefix /path/to/project/root \
    index.android.bundle index.android.bundle.map
If you're using sentry-cli prior to version 1.59.0, pass --rewrite to the upload-sourcemaps command to fix up the source maps before the upload (inlines sources and so forth). Version 1.59.0 does this automatically.
Troubleshooting
If source maps are still not recognized, check for warnings similar to:
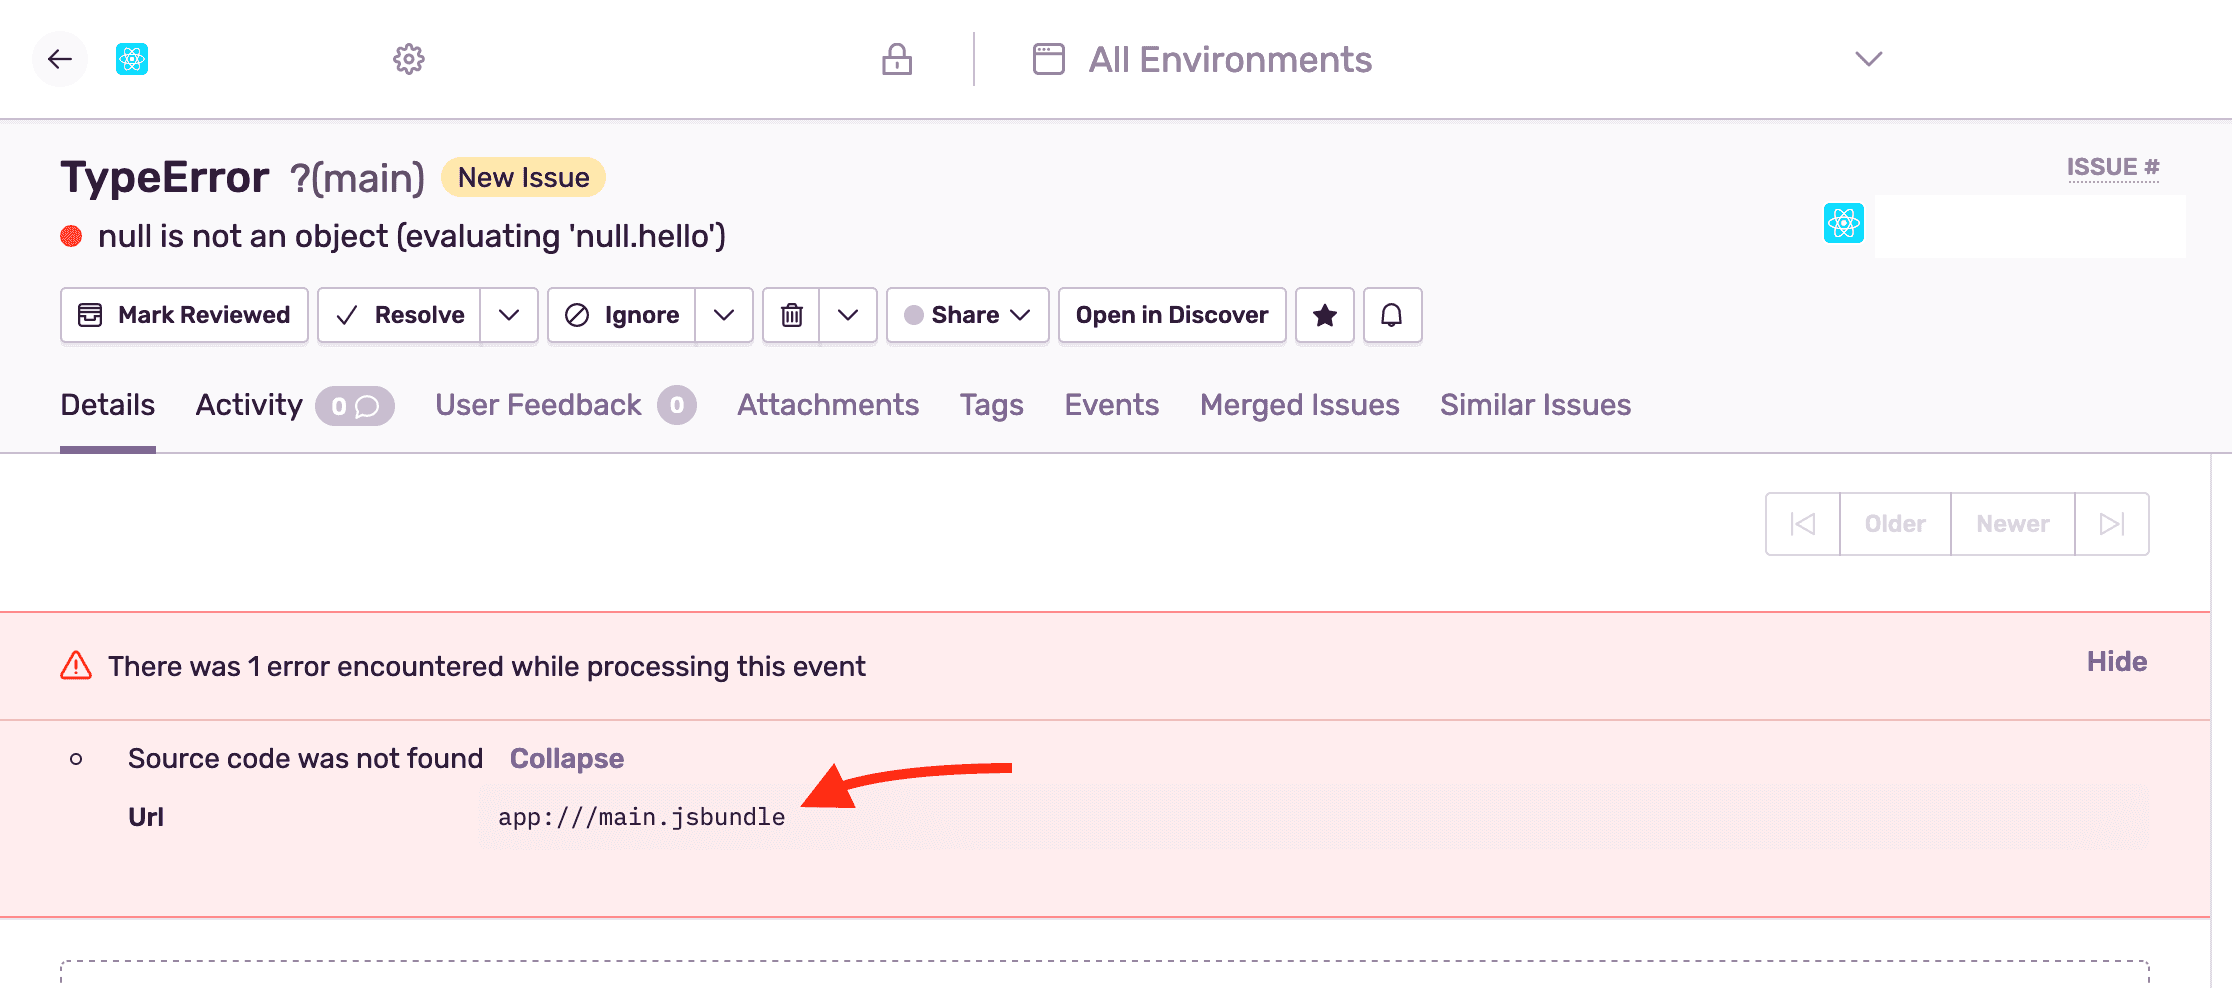
The bundle filename needs to match the filename on the event (and shown on the warning) to correctly apply the source maps.
Find more troubleshooting cases in our Troubleshooting documentation.
Our documentation is open source and available on GitHub. Your contributions are welcome, whether fixing a typo (drat!) or suggesting an update ("yeah, this would be better").
- Package:
- npm:@sentry/react-native
- Version:
- 5.15.2
- Repository:
- https://github.com/getsentry/sentry-react-native